
Why DIY Shower Pans Are a Game-Changer
When you decide to build your own shower pan, you’re not just saving money you’re investing in a bathroom upgrade that’s customized, durable, and built to last. Bathroom renovations can drain your wallet faster than water down a clogged drain, especially when contractors charge a fortune or pre-made pans don’t fit your space. By taking control of the process, you get a shower pan that matches your style, fits your bathroom perfectly, and stands the test of time.
The Hidden Costs of Pre-Made Shower Pans
- Limited sizes and designs
- Expensive shipping and installation fees
- Shorter lifespan compared to custom builds
- Repairs often cost more than replacement
Benefits of Building Your Own Shower Pan
- Cost Savings – You avoid inflated contractor fees.
- Customization – Tailor the size, shape, and finish to your bathroom.
- Durability – A properly built shower pan can last decades.
- Satisfaction – Nothing beats the pride of saying, “I built this.”
Tools and Materials You’ll Need
Essential Tools
- Trowel
- Level
- Utility knife
- Mixing bucket
Materials
- Mortar mix
- Waterproof liner
- Drain assembly
- Tile or stone finish
Step 1: Plan Your Shower Pan Design
Think of this as sketching the blueprint for your bathroom’s foundation. Measure carefully, decide on the slope for drainage, and visualize how water will flow. A good plan prevents costly mistakes later.
Step 2: Install the Drain Assembly
The drain is the heart of your shower pan. Without proper installation, you’ll face leaks and mold. Ensure it’s centered and securely fitted before moving forward.
Step 3: Lay Down the Waterproof Liner
This liner is your shield against water damage. Stretch it across the base, making sure it rises a few inches up the wall. Imagine it as a raincoat for your bathroom floor no leaks allowed.
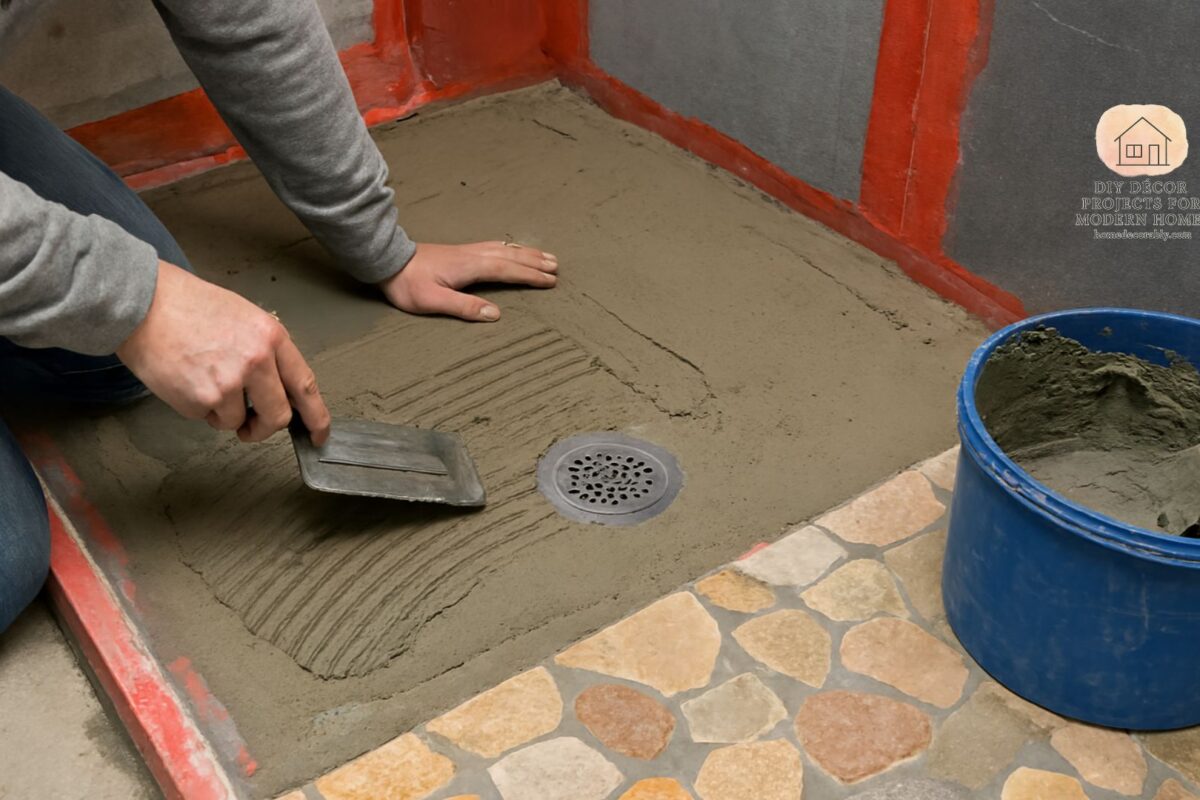
Step 4: Mix and Apply the Mortar
Here’s where things get hands-on. Mix the mortar until it’s thick but workable. Spread it evenly, creating a slope toward the drain. Think of it like frosting a cake smooth, consistent, and slightly angled.
Step 5: Test the Slope
Water should naturally flow toward the drain. Pour a small amount of water to check. If it pools, adjust the mortar. This step ensures your shower pan works like a well-oiled machine.
Step 6: Add the Final Layer
Apply another mortar layer for strength. This is the armor that protects your shower pan from years of use. Smooth it out and let it cure properly.
Step 7: Tile or Stone Finish
Now comes the fun part style. Choose tiles or stones that match your bathroom’s vibe. Whether sleek modern tiles or rustic stone, this finish transforms your shower pan from functional to fabulous.
Common Mistakes to Avoid
- Skipping waterproofing
- Ignoring slope measurements
- Using the wrong mortar mix
- Rushing the curing process
Maintenance Tips for Longevity
- Clean tiles regularly to prevent mold.
- Reseal grout every few years.
- Inspect the drain for clogs.
- Avoid harsh chemicals that damage mortar.
Why DIY Shower Pans Last Longer
Unlike mass-produced pans, your custom build uses stronger materials and better waterproofing. It’s like comparing a handmade leather wallet to a cheap plastic one quality always wins.
Conclusion: Take Control of Your Bathroom Renovation
Building your own shower pan isn’t rocket science. With patience, planning, and the right materials, you can create a durable, stylish foundation that saves money and lasts forever. Why waste cash on overpriced contractors when you can do it yourself? Your bathroom deserves a personal touch, and your wallet deserves a break.
FAQs
1. How long does it take to build a shower pan? Typically, 2–3 days including curing time.
2. Can beginners really build a shower pan? Yes! With clear instructions and patience, even first-timers can succeed.
3. What’s the most important step in the process? Waterproofing skip it, and you’ll regret it.
4. Do I need professional tools? No, basic DIY tools are enough.
5. How long will a DIY shower pan last? With proper care, 20–30 years or more.